Saturday, January 31, 2009


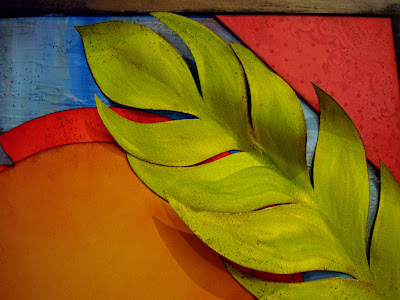
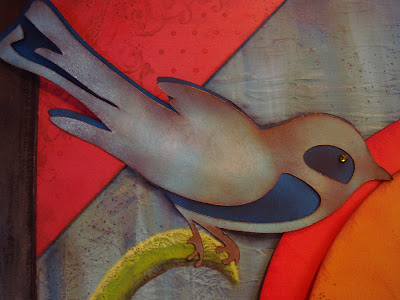
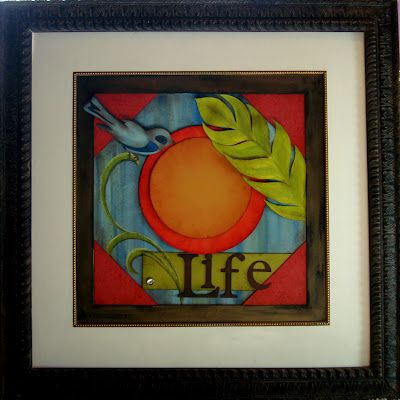
This weekend I decided to check off something that has been on my to do list for over a year now. With baby on the way, there isn't a lot of time left! It feels great to check off on those list huh? It was also fun to do something for me for a change. I know that for most paper crafters the majority of our projects are to be given as gifts or sold. This old painting I had sitting in the corner of my living room floor way to long. I had painted it about 2 years ago and always wanted to redo it because I didn't love the colors. So finally here it is. This is something anyone can do and it was a lot of fun. I'm not exactly sure what you call my personal style, I've seen what looks like my style described in magazines as urban eclectic or global fusion. I don't know, it's about clean lines, not a lot of clutter (there is enough of that going on in my mind!), rustic worn in feeling, but a little modern mixed with some really country stuff ( and I don't mean daisy's and ducks!), More like the ketchy stuff. Most importantly, I love color! How's that for eclectic? You could do your own in anything that reflects your personal style. That is just it, it is a personal reflection that you can be proud of and say, " I did this". As a SAHM I feel it is very important that your home be a reflection of yourself . Someplace that is beautiful and inspiring to you. After all you spend a lot of time there! This piece is a combination of my favorite things; paint, watercolorpaper, cardstock, ink and stamps. The background and flourish were first handpainted. For the leaf I drew one by hand, painted it then cut it out, tuned it over and painted the back. The cardstock from SU! was used for the circles, I traced and cut them out, distressed with paint and ink. The larger one is Tangerine Tango, the smaller is More Mustard. The long rectangle is Kiwi Kiss textured cardstock distressed with ink. The letters are cut from Chocolate Chip on my Cricut machine. The brad in the corner is a build a brad from SU!. The corner's are Rose Red cardstock from SU! and they are distressed and stamped with a large corner stamp from Unity Stamp CO. , the bird was also cut on my Cricut from Pacific Point and Whisper White and then sponged and brushed with different colors of ink. He even has a Swarovski Crystal eye, just to make me happy, it will be hung to far up for anyone else to ever notice. The hole picture was randomly stamped in Chocolate chip ink with a stamp from the Itty Bitty Backgrounds set. This is one of the most versatile stamps I own, any texture stamps is great to have , it adds more depth to your projects.It was all put together with dimensional dots of varied thickness, some where even stacked and glue dots.
I love it, it may not be your style but I hope it inspires you to look at your cardstock, stamps and tools in a new way and create something for yourself that you will love, that makes you happy!

Tuesday, January 27, 2009


Today I decided instead of a card to put some of my other work on here. These are photo's of some sections of the murals in my youngest daughter's, Tia and Chloe's room's. Tia's favorite color is purple and she is all princess so hers is the castle . She was old enough to help decide what she wanted her room to look like. The other photo's are Chloe's room. She was a baby when I did it so I just kinda ran with this idea I had in my head and wanted something very soft and sweet. I was wanting to finish it before I posted pictures ( half of the room and mural was ripped out in our remodel and I haven't yet painted it back) but with a baby on the way I'm going to have to make some changes here and haven't quite decided what to do. Tia's room is going to baby and she and Chloe will share. I might be losing my frog and mouse to do something more "big girl". I don't know , it kinda makes me sad so I haven't decided. If you visit my paper craft planet page you will see a card I did based on the mural in Chloe's room. It is one of the few I have drawn by hand. I thought since I finally got my about me page done it would be a good time to show the other side of what I do. I have two stamps being made at the moment based on Chloe's mural too. One with the frog, the other featuring the mouse. These are just for my personal use, but it will be cool for me to be able to use my own art on a few of my cards without the hassle of tracing my designs over and over. Another plus is that I'll be able to emboss them!

Monday, January 26, 2009


Hello again! The last card I posted on here never made it to auction it ended up selling first. The one I've added today is the one that is currently listed. It was a lot of fun to do, these are some of my favorite colors to work with. This was a Sellabration set that I got from SU! last year and it is just beautiful. The steps in creating the painting take quite a bit of time but if you have never done it I would highly recommend that you try it the results are very gratifying and the finished piece looks like expensive jewelry. Begin with embossing the image and watercoloring, follow up with applying pearl powders. Once this is done you will need to spray it with an acrylic sealer. My wonderful husband has started doing this step for me , after a few times of experiencing cold like symptoms for days afterwards I realized I'm allergic to the spray, so use caution and stay in a ventilated area. The fumes will disappear after it has cured. The last step is as many coats of crystal effects as it takes to get the look you want. You can also use UTE but it has a tendency to want to warp the paper and sometimes is uneven because it moves as it melts. I finished this one off with microbead, copper glass beads and a couple of Swarovski crystal accent's. A little organdy ribbon and copper heart were all this card needed. When the look is very dramatic I like to keep the embellishments to a minimum. You can find instructions for stamping candles on Splitcoast. It is a lot of fun. As the design melts in and you remove the wax paper you are guaranteed to have one of those wow! moment's. Very cool. You can find this card and more pictures of it on ebay under my username, shawnela.

Saturday, January 24, 2009

Good morning cyberspace! Please bear with me I' m a virgin blogger! this is my first !
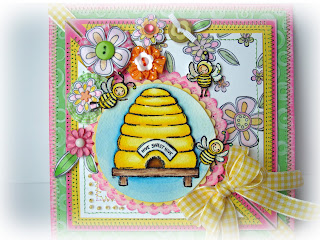
So here is my latest card , the front at least is ready to be sold to the highest bidder. Pulled a late nighter to get it done. This one is different for me, I usually use deeper colors and rarely use much if any embellishment's on a card that has a picture. But you can't have bee's with no flower's and I think in this case the flower's really become a part of the whole scene. I think it's working anyway and that it turned out pretty cute. this stamp set is a new release from Stampin Up! (SU!) It's on a background of scalloped circles from Nestabilities. The flowers are handmade with the same stamp I used to create the background paper, both have been covered with clear emboss. Some of the ribbon flowers are made with various ribbons from my vast collection ( I'm a bit of a ribbon junkie!) and the buttons are from various places too. Except the two on the upper left, they are new so I know they are from SU! new designer series buttons. One of my favorites is the pretty pink flower on the bottom. It is actually broken off from one of my daughters hair things. Recycle, recycle, recycle! I love finding a creative use for some little something I have saved. Call me a pack rat but I don't think you can be a scrapper or card maker without be little bit of one! You never know when that little piece of "junk" is going to be just the thing you need. I used my Cuttlebug's circle embossing folder to add some texture to the background and walla. Done.